The content in this guide is currently being revised to align with the new user interface. Some text and images may be outdated.
Custom Lists
Are Accelo's standard lists not quite fulfilling your unique needs? Not to worry, our Custom Lists allow you to build out your own list pages with almost every option imaginable.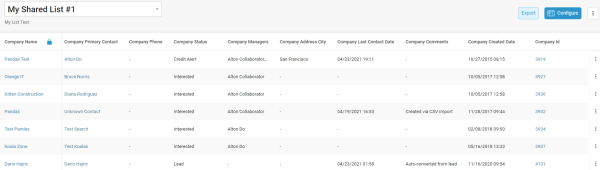
Search, filter, sort, and export your Custom Lists to see detailed snapshots of collections from your Accelo product areas within a time period.
Using this guide, you can:
View your Custom Lists
Use the Custom Lists feature to access a list from different product areas in the platform. Search or sort them in order to find the details you are looking for. By default, inactive or closed items are hidden from results.
To view your Custom Lists:
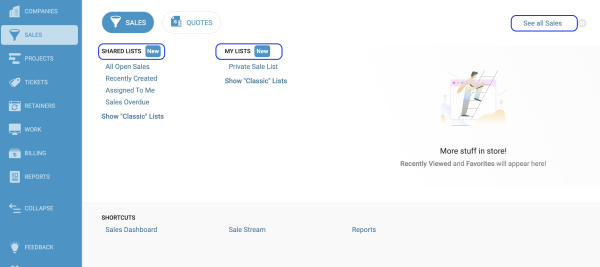
- Choose a Product/ Feature from the Left Hand Side Menu, and select a Shared or Private list.
What you see in the list view
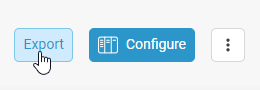
- Export: Click the Export button, and you will receive your current list in CSV format.
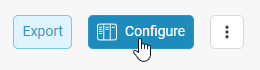
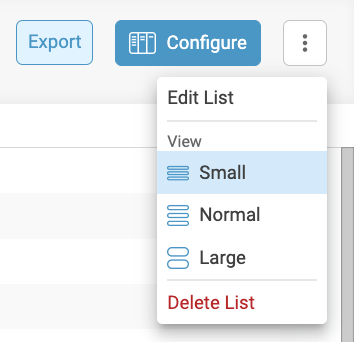
- Configure: This will pop up a window that will allow you to edit your Filters and Columns for your Custom List view.
- Edit List: This will display a list of options to change the standard view of your list from Large, Medium, and Small. This will also allow you to edit details of your current list view that is not Standard. More details on this in the Filters section. The additional option is to Delete the list.
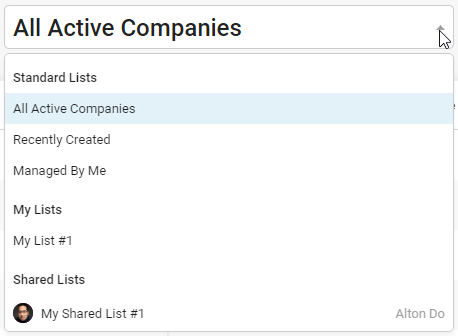
- List Options: A drop-down will appear for your current Custom Module List of all the Standard, Shared, and My List views.
How do I go back to the Classic List view?
If you find our Classic List view more preferable to your workflows, you can easily access them on the Left Hand Side Menu Bar.
- Click on your Product/ Feature of choice Left Hand Side Menu Bar.
- Beneath Shared Lists, Click on Show "Classic" Lists.
Filtering your Custom List
By default, the Custom Lists show Product items with filters respective to the list you've chosen. You can edit these filters using the Configure button, which will provide you a pop-up with your available filters for the Product Item List you're viewing. In the example below, we will be examining Companies.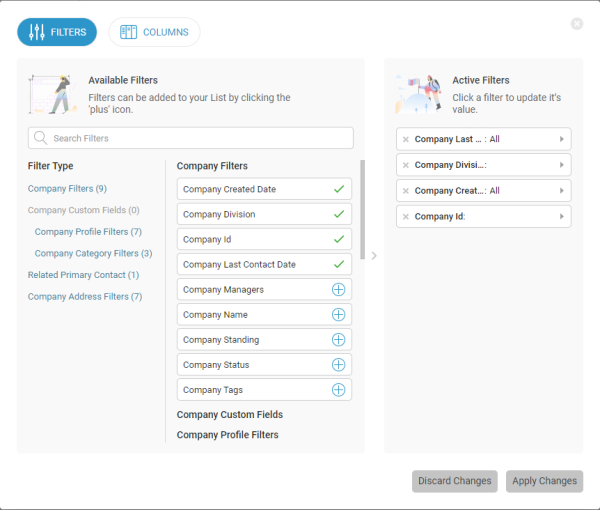
Configuring your Filters
The Filter Configurations break down into four main parts :
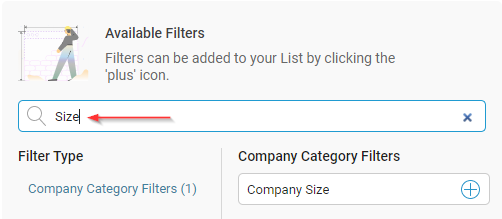
- Available Filters: Search for a Filter by name. If you know the name of the filter you're looking for, you can type it in the search and quickly add it to the Active Filters.
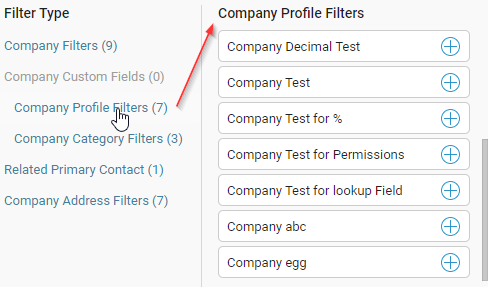
- Filter Type: Sort your Filter List by your Filter Type. Clicking on one of your Filter Types will quickly bring your selected Filter Type to the top of the Filter List for you to add to the Active Filters. Your Filter Types will vary depending on how many you configured and for which Module you're viewing it under.
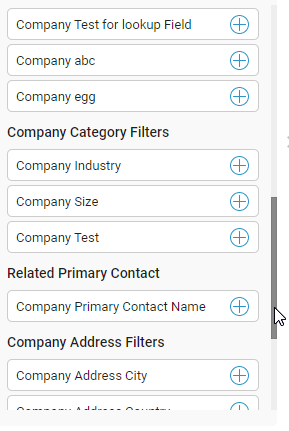
- Filter List: This list in the middle of your Filter Configurations will display your entire collection of available filters for your current module. You can use the scroll bar to review your available options and then select the ones you need for the Active Filters.
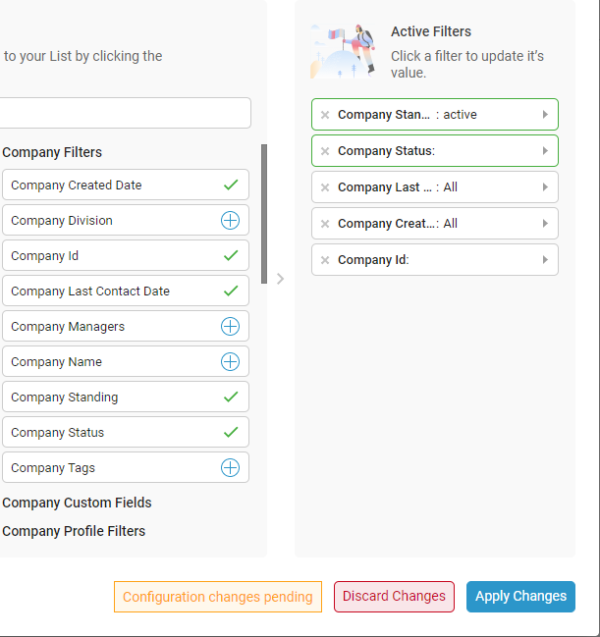
- Active Filters: These are the filters currently activated and used in your current Custom List view. You can see which filters are active by identifying what is showing in the Active Filters.
Applying and Saving your Filters
After understanding how to review your filters and configure them, it is time to apply the necessary changes. The steps are as follows below.
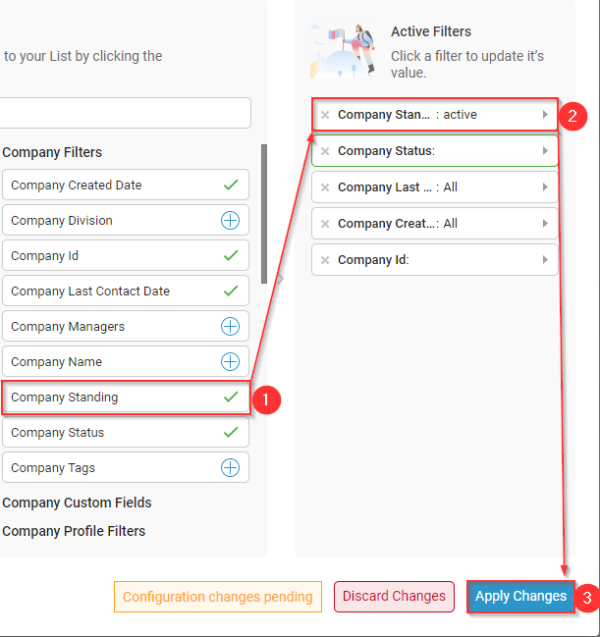
- Selecting your Filters from the Filter List and adding them via the "+" icon at the right of each filter. Applied filters will appear on the Active Filter section and also be depicted with a checkmark in the Filter List.
- Define your filters in the Active Filters. You can now edit the parameters of your Active Filters to decide which values you want reflected in your list view. Simply click on it, and the available options will appear.
- Apply your Changes. Until you confirm your edits with the "Apply Changes" button, none of the settings you edited will save or apply. Click on the Apply Changes button in order to have it refresh your list with the desired filters applied.
Note: You can hit Discard Changes to undo all the edits you've made since you've hit the Configuration button.
Once you've applied your changes, you'll notice an alert in a green pop-up in the top-right of the page. ![]() You can choose "Save as New" to create a new entry to your "My List" or "Shared List" view for your Custom Module List Options. Note: If you're editing an existing list in your My List or Shared List, you'll have an option to "Save" the current list and not just save it as a new one.
You can choose "Save as New" to create a new entry to your "My List" or "Shared List" view for your Custom Module List Options. Note: If you're editing an existing list in your My List or Shared List, you'll have an option to "Save" the current list and not just save it as a new one.
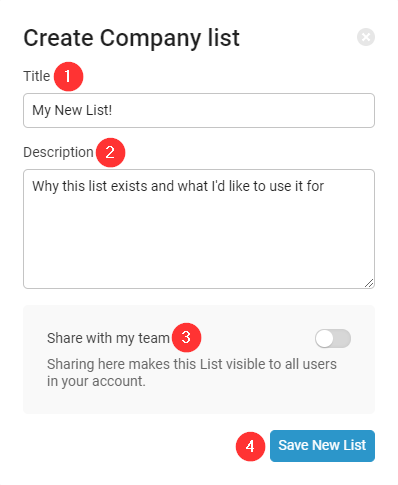
Once you've chosen to Save your list, there are a few things of note.
- Title - This will be the name for your new saved List.
- Description - If you have many lists or decide to share yours, having a description is a good way to know the use case or purpose of your list. This will help others from creating duplicates or unnecessary lists.
- Share With My Team - This option determines whether or not to have your list only accessible to your account under My List or shared with your colleagues under Shared Lists.
- Save New List - This will confirm your settings of the above three and officially save your new List.
Note: You can hit the "x" icon at the top-right if you ever decide not to save your current filtered list view.
Sorting Columns for your Custom List
The Configurations for Columns are nearly identical to that of your Filter List. Before identifying the columns you wish to appear, we strongly recommend you review the previous section to identify which filters you wish to use and deem important.
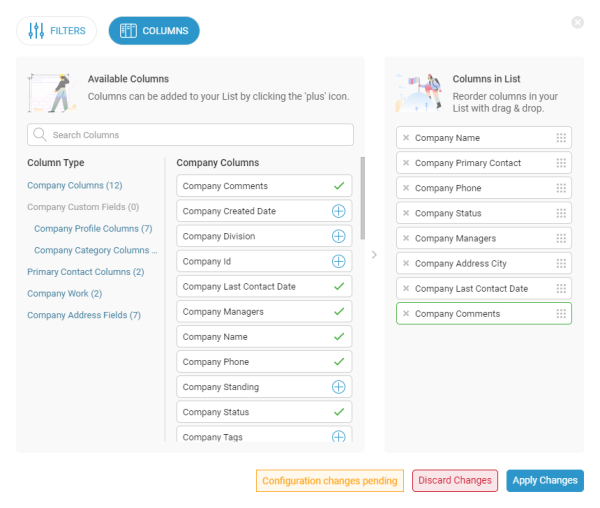
The Column Configurations break down into four main parts, just like the Filter List :
- Available Columns: Search for a Column by name. If you know the name of the column you're looking for, you can type it in the search and quickly add it to the Active Columns.
- Column Type: Sort your Column List by your Column Type. Clicking on one of your Column Types will quickly bring your selected Column Type to the top of the Column List for you to add to the Active Columns. Your Column Types will vary depending on how many Custom Fields and Custom Profile Fields you configured and for which Module you're viewing it under.
- Column List: This list in the middle of your Column Configurations will display your entire collection of available filters for your current module. You can use the scroll bar to review your available options and then select the ones you need for the Column Filters.
- Column Filters: These are the columns currently activated and used in your current Custom List view. You can see which columns are active by identifying what is showing in the Active Column.
Once you've applied your changes, you'll notice an alert in a green pop-up in the top-right of the page. ![]() You can choose "Save as New" to create a new entry to your "My List" or "Shared List" view for your Custom Module List Options. Note: If you're editing an existing list in your My List or Shared List, you'll have an option to "Save" the current list and not just save it as a new one.
You can choose "Save as New" to create a new entry to your "My List" or "Shared List" view for your Custom Module List Options. Note: If you're editing an existing list in your My List or Shared List, you'll have an option to "Save" the current list and not just save it as a new one.
Once you've chosen to Save your list, there are a few things of note.
- Title - This will be the name for your new saved List.
- Description - If you have many lists or decide to share yours, having a description is a good way to know the use case or purpose of your list. This will help others from creating duplicates or unnecessary lists.
- Share With My Team - This option determines whether or not to have your list only accessible to your account under My List or shared with your colleagues under Shared Lists.
- Save New List - This will confirm your settings of the above three and officially save your new List.
Note: You can hit the "x" icon at the top-right if you ever decide not to save your current filtered list view.
Columns in your List view are not only sorted by your configurations, but you can also drag the width of the columns to your aesthetic needs, as seen below.
Export your Custom Lists
Much like every other list or reporting tool in Accelo, we offer a method to export the information for your records. The steps to do this are as quick and as simple as possible.
- Click on the Export button of your Custom List at the top right.
- A pop-up will confirm which email address your Export will be sent to.
- Navigate to the email address mentioned above, and click on the link in the received email to download your CSV Export.